|
Subject: how to guide for working from home |
|
From: Lloyd Smith |
|
Date: Mon, 21 Jun 2010 21:07:40 -0400 |
|
To: Office Staff |
|
|
Hi all
In light of the upcoming G20 inspired four day weekend ...err I mean
telecommuting
opportunity, I thought it would be prudent to provide this quick guide.
In the last couple of years remote access to departmental Windows systems has
improved greatly, so if you recall the instructions for accessing
"WebDAV",
or mapping your home directory you will be relieved to know there are now
much better options.
You will need a computer and an internet connection at home (or wherever
you are telecommuting from). The computer does not need to be new, modern,
or fast, and can run Windows, MacOS, Linux, etc.
Internet access should be
broadband, not dial up, but even the cheapest offerings from
whatever ISP you have should be usable.
There are two basic steps:
first you will create a "Virtual Private Network" (VPN) connection from your
home machine to CSLab's VPN server.
Second you'll open a "remote desktop" session from your home machine
to
your work computer.
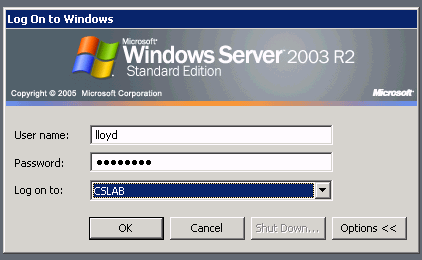
Step 0. Create a VPN account.
If you already know your VPN info, skip to step 1.
CSLab has recently revamped their support pages. From
the Remote Access
introductory page ( http://support.cs.toronto.edu/wiki/RemoteAccess
) follow
the link describing the VPN service and then the self-serve VPN account
registration
link that will take you to https://csweb.cs.toronto.edu/vpn.html
Log in with your cslab username and password and the
page will display your
VPN credentials. Print the page, or otherwise record the password displayed.
The VPN is one of the few cases where you do not use the same password that
works everywhere else; this is for security... any password that can be
displayed
on a web page or emailed to you is insecure.
Step 1. Establish the VPN connection.
The cslab support pages have detailed instructions,
(with pictures!), about
how to set up the VPN connection on various versions of Windows and
MacOS. You should only need to configure the settings
once. After that
you will be able to launch the connection from your start menu (in Windows)
or the top menu bar (for Mac).
Once established your home machine will have an encrypted
network connection
over the Internet to a server behind the department's external firewall.
It's
important to recognize that all of your machine's internet traffic will now be
going through the University's gateway connection, and subject to University
policy, in particular, the traffic analysis and blocking section found on
http://www.noc.utoronto.ca/net-ops/security.htm
If you run peer to peer file sharing on your home machine, (BitTorren
t,
Limewire, Kaaza, etc.),
turn it off before you establish the vpn tunnel.
If the NOC detects undesirable activity they will block access to the
department,
for *everyone* using the VPN, not just you. This probably won't affect most
staff, but it is important to be aware of.
To get started, launch the vpn connection from your
home machine and log in.
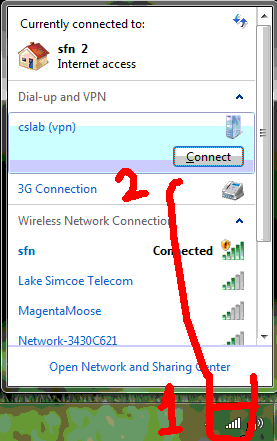
In the example here, I named the connection "cslab (VPN)" when I set it up
Windows XP
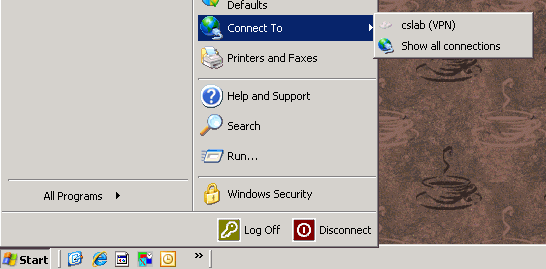
Under Windows 7, right click on the network icon ( 1 ) then connect to the VPN ( 2 ):
You should see some status messages during negotiation, then a connection
established message.
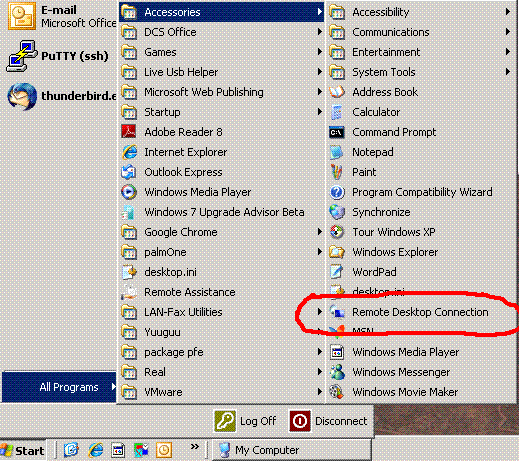
Step 2. Begin an remote
desktop connection.
You will need a remote desktop client. If you run Windows XP or later, you can
find
one under All Programs > Accessories
You can also type " mstsc " in the Run
dialog. ( Window key - R )
You will need to install it on a Mac, there isn't a native client. Get it from
Microsoft:
http://www.microsoft.com/mac/products/remote-desktop/default.mspx
or use CoRD
http://cord.sourceforge.net/
You will be asked what machine you want to connect to
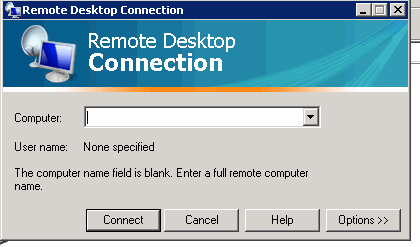
Everyone can connect to cslab's Windows Application
servers, " wapps2003.cs.toronto.edu "
and " wapps2007.cs.toronto.edu " (named after the version of MS
Office installed):
If you want your desktop machine (and you probably do) you will need
to know its name. For many staff machines, the "C:" has been given
the
same name as the PC. Launch My Computer and look for the name.
In the example here, the name is "feldspar"
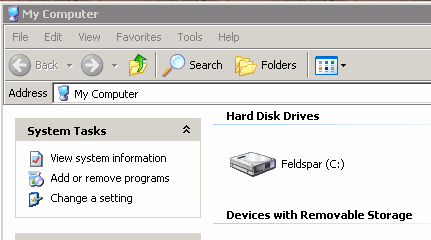
To connect to this machine enter "feldspar.cs.toronto.edu" in the
connection
dialog.
When you connect, you will likely be warned:
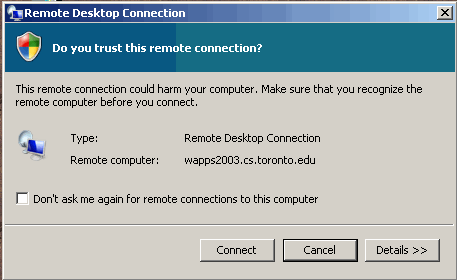
Check the box if you don't want to be warned each time.
While the Windows Application servers will accept connections from any cslab
user, the desktop machines will not. I have to configure your machine to allow
you to login remotely, or you will get a message:
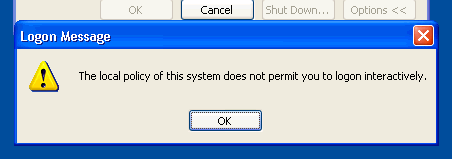
Let me know if your machine is not yet set up for access.
Once connected you can use the machine just as if you are
there. Instead
of pressing Crtl-Alt-Del, use the "Windows
Security" icon found on
the start menu.
Remember that you do need to leave your computer running when you leave
work, since the one thing you can't do remotely is press the power button.
Cheers,
lloyd