80-629 -- Introduction to computational resources
Python is an open-source language. It can be used through multiple interfaces (e.g., command line or GUI on your local computer). In this course, we are going to use our web browsers to access a python notebook (jupyter notebook) which will allow us to run our code on a remote server. This interface will be particularly useful when we want run machine learning algorithms on a cluster of machines.
We will use the computational resources of Google Cloud. We could have used other services (e.g., we could have built a local cluster of machines or used other services such as Amazon AWS or Microsoft Azure). I have taken care of and will try to take care of all Google specific settings which means that everything you will learn will be independant from this service and would be easily done on most modern clusters.
Today's class is for familiarizing yourself with
-
an ipython notebook;
the python programming language.
You can think of an ipython notebook as the interface that will allow you to run python programs (much like RStudio is an interface to run R programs).
Accessing the cluster. The cluster is accessible through this URL:
http://35.237.167.110:8080/
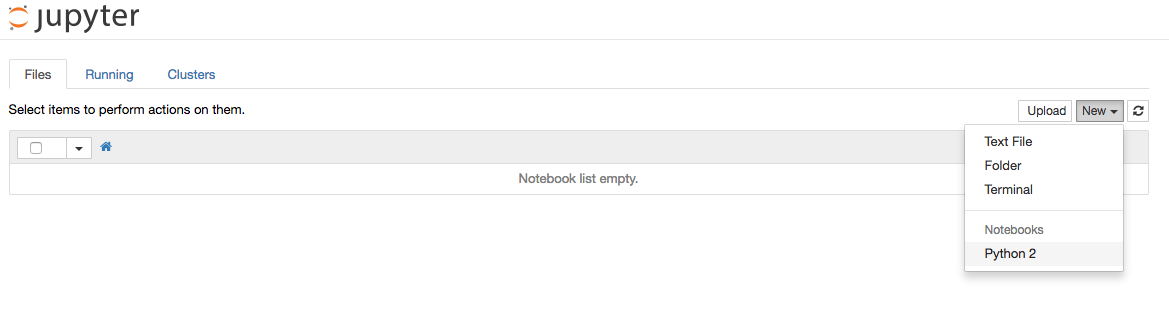
Starting your own notebook. Each person (or team) will use its own notebook. Today you will need a single notebook. In general, you can create as many notebooks as you like. I would suggest creating one for every task you have. For example, one for processing data, one for running a models on this data (your project will likely use several notebooks). You can also create a directory that will contain all of your notebooks. To start a new notebook simply click on the "New" button.
80000320-lcharlin.ipynbStatus of a notebook. As mentionned above notebooks serve
two main functionalities. The first is as code editor. You can think
of a notebook as a file where you can store your code. The power of a
notebook comes from the fact that you can easily execute its code.
Further, a notebook also allows you to save the current state of
execution (i.e., which part of the code was executed but also
intermediate results). A notebook saves that information using its
Using a notebook. Now the interesting part. A notebook
contains cells. Cells are where your code (and markdown comments) can
go. You can add and remove cells using the
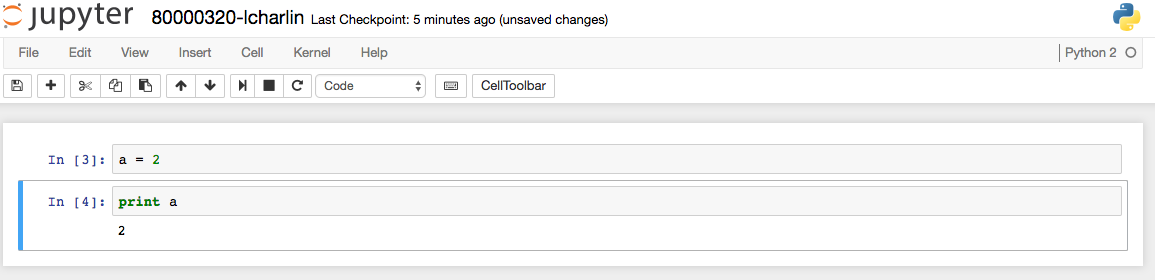
The text at the left of a cell indicates it status. It may never have been executed ("[]"), it may currently be executing ("[*]") or it may already have been executed ("[3]"). In the latter case, the number indicates how many cells have been ran before (it can be useful to keep track of the order you have ran cells in).
To execute the content of a cell simply select the cell and press "Ctrl-Enter". As an alternative, the "Cell" menu can be used to run one or multiple cells. Once a cell is executed anything that the executed code outputs will be shown below the cell. By default the cell also prints the result from the last line of the cell.

Here are other useful properties of cell:
-
You can cut and paste code into a cell.
Cells can also be used to contain comments. In that case it's
best to use the "Markdown" mode (see at the top of your notebook
window).
Since we will use notebooks throughout the semester I encourage you to experiment with their various features.
Saving notebooks. Please make sure to save your notebooks often ("File/Save and Checkpoint"). This will ensure that your work is saved in case a machine crashes.
Once you feel comfortable with notebooks please jump to the second part of this lesson coding with python.