- If working from CDF-PC, double click on the "Applications" folder which will be showing on your desktop, and then double click on the "CodeWarrior" icon.
- If working from home, select Start -> Programs -> CodeWarrior Pro 5 -> CodeWarrior IDE
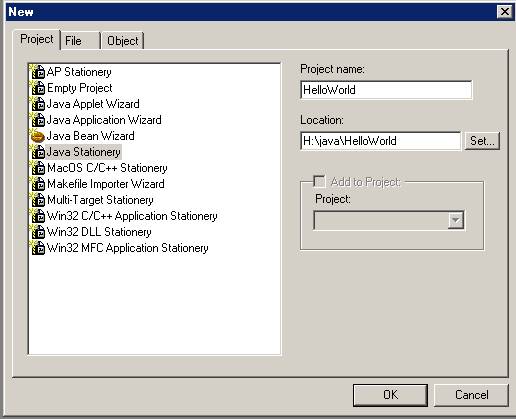
- To open a new project, select File -> New...
- Click on Java Stationary
- Project name: HelloWorld
(We are using the name of the class containing the main method.
Alternatively, we could use the name of the folder where your files are stored.) - Location: H:\java\HelloWorld
(Choose a folder/directory that you have write permission on. Your files for this program will go here. If the "java" folder does not already exist in your H: drive, you will need to click on "Set...". This will bring up a "Create New Project..." window. Change "save in:" to H: and then click on the yellow Create New Folder icon and type in "java" and then click "Open" and then click "Save."), and then click OK.
[Notice that whatever name you choose for Project name will always be the last part of your Location.][Note that we could have simply used a Location name of H:\HelloWorld. Having the "java" directory, however, helps to organize things better on your harddrive. This is especially helpful if you are working from home and have several other folders already on your hard drive.]
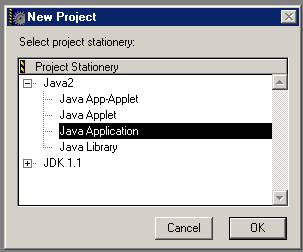
- Click on the "+" next to Java2 to open it up, and then select
Java Application (or you may find the Csc 1.1
stationary works better if you're working from CDF-PC), and click
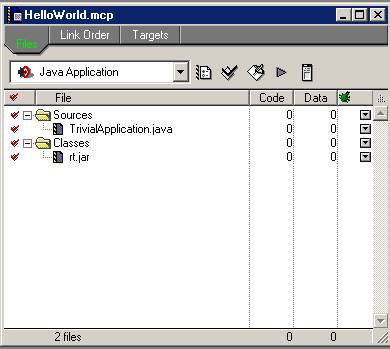
on OK. This will bring up a HelloWorld.mcp window.
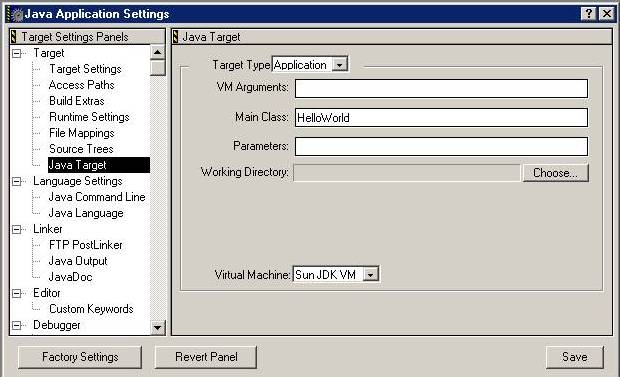
- Select Edit -> Java Application Settings... (or you could click on the icon for this in your mcp window)
- Click on Java Target (under the Target settings)
- Main Class: HelloWorld
(change this to the name of your class containing the main method). - Click on Save, and then close the window by clicking the "x"
in the top right corner of the window.
- Click on Sources in the HelloWorld.mcp window to highlight it. This ensures that the file you add or create will be put into the Sources folder.
- (a) Create new Java file
- Select File -> New Text File
- Type in this simple program into the empty window:
         public class HelloWorld {
             public static void main (String[] args) {
                 System.out.println ("Hello World!!");
             }
         }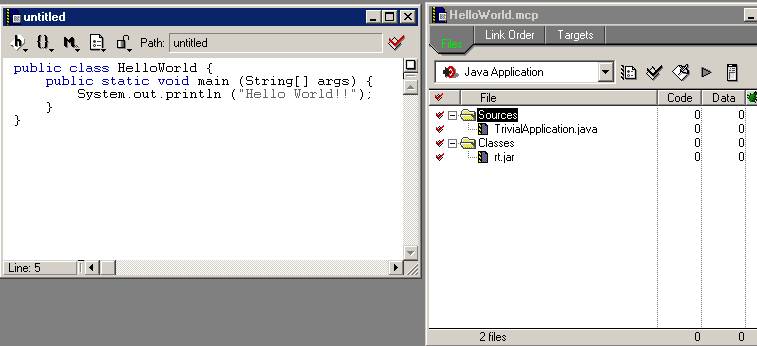
- Now save the file, using HelloWorld.java as the filename. Select File->Save As and type HelloWorld.java for the filename.
- (b) Add existing Java file
- If the file that you want to include in your project is on the course web site, at this point you would click on this file from the course web site and then save it in your H:\java\HelloWorld directory.
- If the file that you want to include in your project is in some other directory on your computer, you can use Windows Explorer to move the files into the H:\java\HelloWorld directory at this point. More details about using Explorer are provided in the section at the end of this document.
- For both part (a) and (b)...
With Sources still highlighted, click Project -> Add Files... and select the HelloWorld.java file in the H:\java\HelloWorld directory. (If desired, more than one file could be selected by holding the CTRL key and left clicking each file).
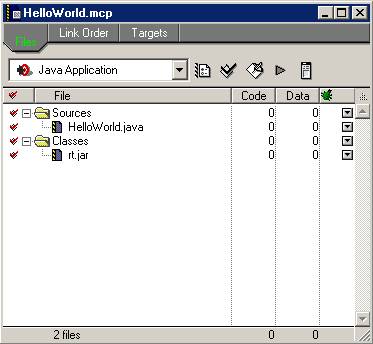
- The HelloWorld.java file will automatically be added to Sources in your HelloWorld.mcp window. If you don't see it there, click on the various tabs in this window (Files, Link Order, Targets) to cause it to refresh. [This seems to be a CodeWarrior bug.]
- Click on the "+" next to Sources, and you will see the files that are part of this program. Double click on your ".java" file to bring up a window that will allow you to view or edit it.
- If you used the Java Application stationary in step 2 above,
you will have a file called TrivialApplication.java in your Sources
folder. This file is created automatically by the Java Application
stationary, and can be deleted. Click once on TrivialApplication.java
to highlight it, and then press the Delete key on your keyboard, and
then click on OK.
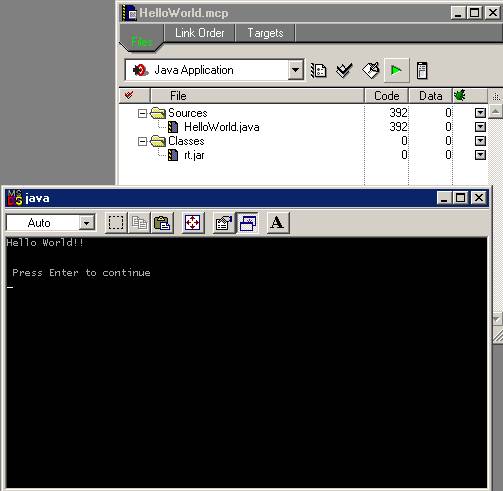
- Select Project -> Make (or the Make icon). Any compile errors will come up at this time. They will indicate the line number that has a problem.
- Select Project -> Run (or the Run green arrow icon). The output
will come up in an MS-DOS window. Any input for the program would be
entered here. Press Enter in this window when the program has
finished.
- Select File-> Exit to leave CodeWarrior. Your project will be saved.
- Suppose you want to modify the HelloWorld project the next time you use CodeWarrior. You would start up CodeWarrior as outlined in step 1, and then you would select File -> Open... An Open window will pop up. You will change the directory in this window until you get to H:\java\HelloWorld, and then you will open the HelloWorld.mcp file. It stores all the information about your project.
- Another way of reopening a project is to locate the project's HelloWorld.mcp file from within Explorer (or by double clicking on My Computer, H: drive, java, and then HelloWorld.mcp), and then you can double click on it. This will start up CodeWarrior, and take you right into that project. Note that since there are two types of HelloWorld files in the directory, you might have to select View -> Details in Explorer to determine which is the CodeWarrior Project file that you want to open.